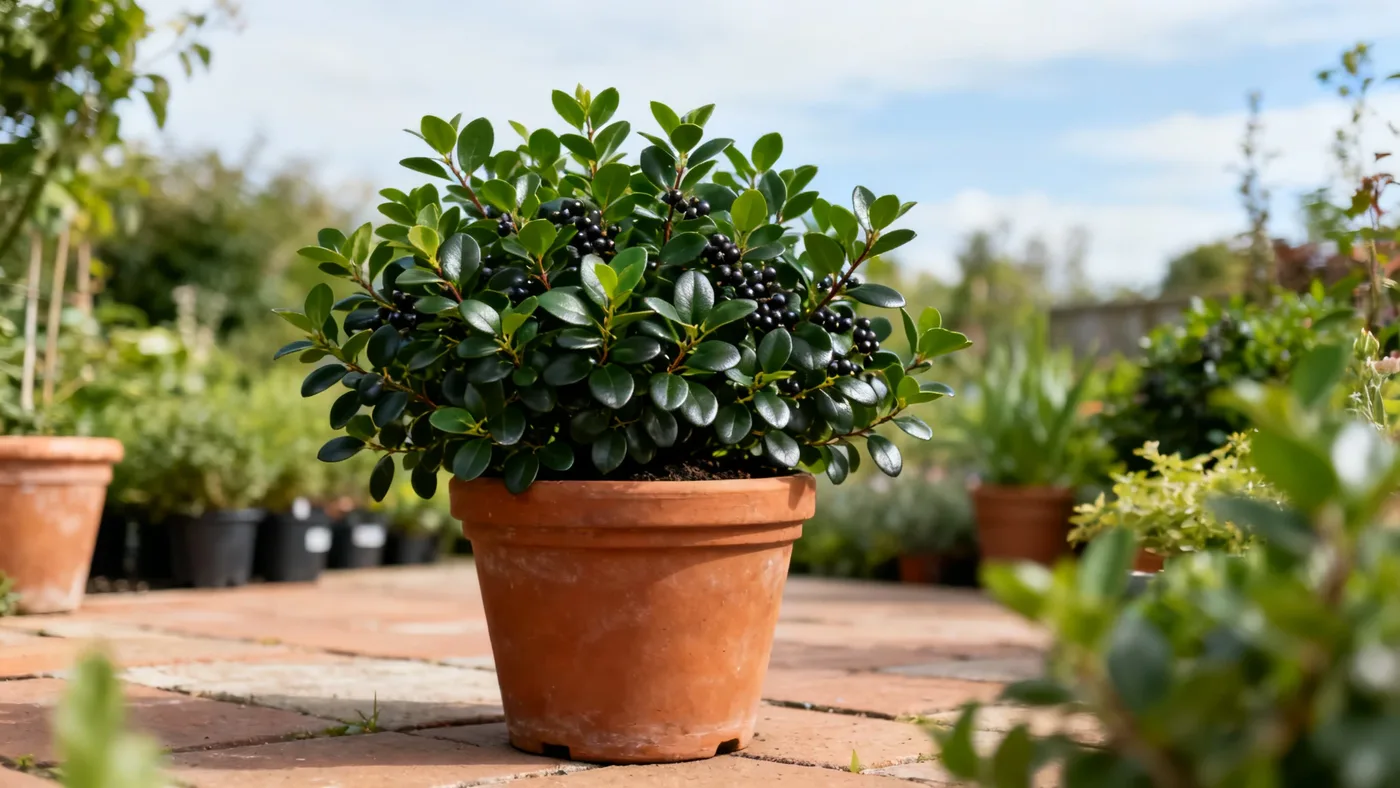
Growing Chokeberry Bush in Containers and Pots
Chokeberry Bush makes an excellent choice for container gardening. Whether you're working with a small patio, a balcony, or you simply want to move the shrub seasonally, growing Chokeberry Bush in containers delivers the same fall color and wildlife benefits as an in-ground planting, all within a footprint you control.
The dwarf and groundcover cultivars of Chokeberry Bush (Aronia melanocarpa) are particularly well-suited to container life. These compact varieties typically reach 1 to 2 feet in height and 2 to 3 feet wide at maturity, fitting neatly into containers on decks, terraces, and entryways. Even in pots, they'll reward you with the same outstanding vivid red to orange-red fall color the species is known for, plus persistent dark purple-black berries that birds treasure through winter.
Why Chokeberry Bush Works in Containers
Container-grown Chokeberry Bush gives you flexibility. You can position it in full sun for best fruiting and fall color, move it away from harsh afternoon exposure if needed, and bring a potted specimen indoors for a short winter display before returning it outdoors in spring. Because Chokeberry Bush tolerates wet and poorly-drained soil naturally, it won't rot in a container that stays consistently moist, a concern that stops many shrubs in pots.
The plant's moderate growth rate, roughly 6 to 12 inches per year, means it won't quickly outgrow its pot, and it responds well to light pruning if you want to shape it. The shrub flowers within 2 to 3 years of planting, so even a young container plant will give you spring blooms and fall color relatively soon.
Choosing the Right Container
Size matters more than you might think. For a dwarf Chokeberry Bush cultivar, start with a container at least 12 to 15 inches in diameter and 12 to 14 inches deep. For a larger specimen or if you plan to keep the plant for many years, an 18 to 20-inch pot gives the roots room to establish fully. The shrub is long-lived, commonly cited around 20 to 30 or more years with good care, so a larger pot means you won't need to repot as frequently.
Drainage is essential. Use a pot with drainage holes in the bottom; excess water must escape or roots will rot despite the plant's tolerance for moist soil. Terracotta, fabric pots, and plastic containers all work. Terracotta breathes, drying soil slightly faster, which some gardeners prefer. Fabric and plastic pots retain moisture longer, useful in hot or dry climates.
Color and material affect how much the soil warms in sun. Dark containers absorb heat; light-colored pots stay cooler. In hot climates (zones 8 to 9), a lighter pot can help moderate root temperature. In cooler zones (3 to 6), a darker pot may be an advantage.
Materials and Ingredients You'll Need
- One container, 12 to 15 inches diameter minimum, with drainage holes
- Potting soil or a blend of peat moss, perlite, and compost
- A young Chokeberry Bush plant (usually from a 1-gallon or #1 nursery container)
- Balanced, slow-release fertilizer (10-10-10 or similar)
- Mulch, optional; wood chips or pine bark, 1 to 2 inches deep
- Watering can or hose with a gentle spray
- Pruning shears
- Gloves, optional
Step-by-Step Growing Instructions
Step 1: Prepare Your Soil Mix
Chokeberry Bush prefers soil that is consistently moist but drains well. Standard commercial potting soil works, but you can create an ideal mix by combining equal parts peat moss (or coconut coir), perlite, and compost. The perlite ensures drainage and aeration, the organic matter retains moisture and nutrients, and the compost provides slow-release fertility. If you prefer a simpler approach, a high-quality potting soil formulated for shrubs is sufficient on its own.
Aim for slightly acidic to neutral soil, roughly 5.0 to 7.0 pH. Container soils tend to be fairly neutral, so this is rarely a problem with commercial mixes. Avoid strongly alkaline soils, which can trigger chlorosis (yellowing leaves) in Chokeberry Bush.
Step 2: Fill the Container
Pour soil mix into the bottom of the container, filling it about one-third full. This creates a bed on which to set the plant's root ball. Leave enough room so that when the plant is positioned, the top of its root ball sits at or just below the rim of the container. If the root ball sits too low, watering becomes difficult; too high, and roots may dry out.
Step 3: Position and Plant Your Chokeberry Bush
Remove the young plant from its nursery pot and gently tease apart the root ball with your fingers to encourage roots to spread into the new soil. Set the plant in the center of the container and begin filling around it with soil mix. Firm the soil gently as you fill, ensuring no large air pockets remain. Water lightly as you go to settle the soil and eliminate trapped air.
Step 4: Water Thoroughly and Apply Mulch
After planting, water the container slowly and deeply until water drains from the bottom. This first watering settles the soil and hydrates the root ball. If desired, apply 1 to 2 inches of mulch (such as shredded wood chips or pine bark) on top of the soil, keeping it a few inches away from the plant's stem to prevent stem rot.
Step 5: Position for Light
Place the container in full sun or part shade. Full sun delivers the best fall color and fruiting, though the plant tolerates part shade. If your patio is very hot in afternoon, dappled or morning sun may prevent stress in the hottest climates.
Step 6: Establish a Watering Routine
During the first growing season, keep the soil consistently moist but not waterlogged. Check the soil 1 to 2 inches below the surface; if it feels dry, water deeply. In spring and summer, you may water every 2 to 3 days, depending on temperature and container size. In fall and winter, water less frequently as growth slows, but never let the soil dry out completely.
Step 7: Fertilize in Early Spring
Once established, after the first season, apply a light feeding of balanced, slow-release fertilizer in early spring as new growth emerges. Follow the product label for application rates and frequency. Container plants use nutrients faster than in-ground shrubs, so a second light feeding in early summer is sometimes helpful, but avoid over-fertilizing, which can force excessive soft growth.
Step 8: Prune as Needed
Chokeberry Bush needs minimal pruning. Prune right after flowering in late spring or in late winter to remove any dead wood or misshapen branches. Light pruning encourages bushier growth and helps control the plant's size if the container is snug. Avoid hard pruning, which is rarely necessary.
Container Care Throughout the Year
Spring is the prime growing season. Apply fertilizer, monitor for pests (aphids and scale insects occasionally appear on container plants), and prune if needed. By mid-spring, around April to May depending on your zone, the plant will flower with small white to very pale pink blossoms in flat clusters, attracting bees and other pollinators.
Summer requires consistent moisture. Heat and sun accelerate soil drying in containers, especially in small pots. Check soil moisture regularly and water as needed. The foliage remains glossy dark green through summer.
Fall showcases the plant's strongest visual payoff. The foliage turns vivid red to orange-red, and the berries ripen to dark purple-black, persisting into winter and providing food for songbirds. In colder zones, 3 to 5, move the container to a sheltered location if winter winds are severe, though the plant itself is extremely hardy.
Winter in containers requires care in the coldest zones. Roots in above-ground containers experience colder temperatures than in-ground plants. In zones 3 to 4, consider wrapping the pot with burlap or moving it against a south-facing wall for additional insulation. Water sparingly in winter, but do not let the soil dry out completely. Evergreen boughs placed around the pot provide insulation without trapping moisture.
Tips and Common Mistakes to Avoid
Mistake: Choosing a pot too small. A container smaller than 12 inches in diameter restricts root development and forces frequent watering and repotting. Start larger and give roots room to mature.
Mistake: Skipping drainage holes. Saucers that trap water are one of the quickest ways to kill a container plant. Even Chokeberry Bush, which tolerates wet soil, will rot if standing in stagnant water. Always use a pot with drainage and allow water to escape.
Mistake: Neglecting watering in spring and summer. Container soil dries faster than garden soil. Check moisture frequently, especially in hot weather. Letting the plant dry out completely during its growing season stresses it and reduces flowering and fruiting.
Tip: Repot every 3 to 5 years. As the plant grows and uses up soil nutrients, refreshing the potting mix ensures continued vigor. Do this in early spring before growth begins.
Tip: Combine with complementary plants. Chokeberry Bush's glossy foliage and fall color pair well with low-growing companions in a large container. Try purple coneflower (Echinacea), ornamental grasses, or sedums for a long-season display.
Tip: Deer won't browse it. Chokeberry Bush has good to high deer resistance, making it a safe choice if deer visit your patio or balcony.
Expected Results
A well-tended, container-grown Chokeberry Bush will flower within 2 to 3 years of planting, rewarding you with spring blooms and supporting pollinators. Fall color develops reliably when the plant receives full sun, delivering the vivid red to orange-red foliage Chokeberry Bush is prized for. Berries persist into winter, supporting songbirds and adding visual interest long after leaves drop. With consistent care, a container-grown Chokeberry Bush can thrive for 20 to 30 or more years, making it a durable long-term investment in your patio or garden.
For comprehensive care guidance beyond container growing, see our complete Chokeberry Bush care guide.
Quick Reference Checklist
| Task | Timing | Notes |
|---|---|---|
| Plant Chokeberry Bush | Early spring or fall | Use dwarf cultivars in 12 to 15-inch minimum containers |
| Water | Spring/summer: every 2 to 3 days; fall/winter: as needed | Keep soil consistently moist but not waterlogged |
| Fertilize | Early spring, light application | Balanced slow-release fertilizer (10-10-10) |
| Prune | After flowering (late spring) or late winter | Remove dead wood; minimal shaping required |
| Monitor drainage | Always | Ensure pot has drainage holes; water must escape |
| Expect flowers | 2 to 3 years after planting | White to pale pink blooms in April to May (zone dependent) |
| Expect fall color | Autumn (every year) | Vivid red to orange-red; best in full sun |
| Expect berries | Late summer through winter | Dark purple-black, persistent; attracts birds |
| Repot | Every 3 to 5 years, early spring | Refresh soil mix; may move to larger container |
| Winter protection (zones 3 to 4) | Late fall through early spring | Wrap pot or move against wall; avoid drying out |