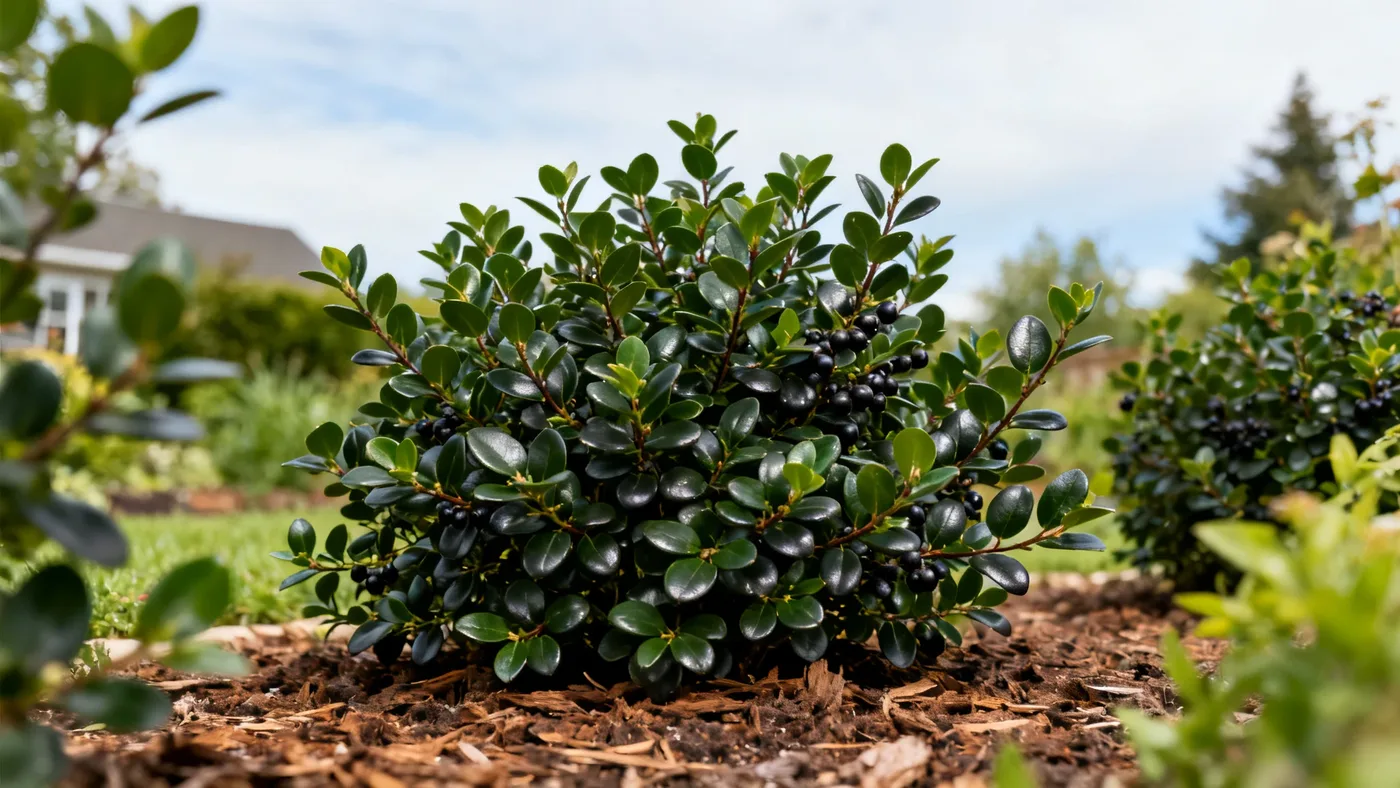
Chokeberry Bush Berries: Are They Edible and How to Use Them
If you've grown chokeberry bushes for their stunning fall color and winter interest, you might wonder what to do with the glossy dark purple-black berries that persist on the branches from fall through winter. The answer is yes, they are edible, but there's an important caveat: they're extremely astringent raw. Most gardeners find their true value in the kitchen, transformed into jams, juices, and syrups that are tart, flavorful, and deeply colored. This guide walks you through harvesting, preparing, and using chokeberry berries so you can make the most of your plant's fruit.
Are Chokeberry Bush Berries Really Edible?
Chokeberry berries (Aronia melanocarpa) are absolutely edible and are not known to be toxic to people or pets. However, "edible" and "pleasant to eat raw" are two different things. The berries earned their common name partly because of their intense astringency when raw. If you bite into one fresh off the branch, you'll experience a puckering sensation that makes your mouth feel dry and tight. This is not a sign of danger, just a sign that these berries are better suited to cooking.
The astringency decreases dramatically when the berries are processed into jam, juice, or syrup. Heat and sugar transform them into something genuinely delicious: a tart, complex flavor with subtle fruit notes and a beautiful deep purple-black color. Home gardeners and small producers have used chokeberry berries for generations to make preserves, and they are commonly used for juices and syrups. If you want to eat them fresh, freezing them and thawing them partially softens the astringency somewhat, though they'll still be tart.
When to Harvest Chokeberry Berries
Timing matters for flavor. The berries develop their best flavor after a frost, when starches convert to sugars. In most growing zones (3 through 9), this happens in mid to late fall, roughly 8 to 12 weeks after the small white to very pale pink flowers bloom in late spring.
The berries change color as they ripen. They start reddish in early fall and gradually deepen to a glossy dark purple-black. Wait until they are fully dark purple-black before harvesting. The berries will still be firmly attached to the stems at this point; they don't fall off easily like some fruits. You can harvest them individually or cut small clusters of berries still attached to twigs, which makes the work faster.
Check the berries by gently tugging one. If it comes away easily with a light pull, it's ready. If it resists, give the plant another week or two. The berries persist into winter, so you have a fairly long window to harvest. Late October through November is typical for most gardeners, though exact timing varies by zone and local weather.
Materials and Tools You'll Need
- Small pruning shears or scissors (optional, for cutting clusters)
- Clean containers or baskets for collecting berries
- Colander or fine mesh strainer
- Cool water for rinsing
- Paper towels for drying
- Freezer bags or airtight containers (if storing berries raw)
You don't need special equipment to harvest chokeberry berries. Many gardeners simply hand-pick them directly into a bowl or basket.
How to Harvest Chokeberry Berries Step by Step
Step 1: Check ripeness and plant health. Before you begin, walk around your chokeberry bushes and confirm that the berries are fully dark purple-black. Taste one if you're unsure whether it's fully ripe. A ripe berry will be softer and taste less harsh than an underripe one, though it will still be tart. Make sure your plant is free of visible disease or pest damage.
Step 2: Prepare your collection containers. Use clean baskets, bowls, or shallow containers to collect the berries. Avoid containers that are too deep, which can crush berries under their own weight. Have several ready so you don't have to stop and empty a full container mid-harvest.
Step 3: Hand-pick individual berries. Hold the stem firmly in one hand and gently roll individual berries between your thumb and forefinger, pinching them away from the stem. This is the slowest method but gives you the most control over which berries you take. Work through the outer canopy first, where berries get the most sun and are fully ripe. Move inward toward the center of the plant.
Step 4: Alternatively, clip small branches. If you prefer speed over precision, use small pruning shears to cut small twigs that have 5 to 10 berries still attached. Strip the berries from the twigs later, after you bring them inside. This method is faster and works well if you don't mind a few underripe berries mixed in.
Step 5: Rinse the berries gently. Transfer your harvested berries to a colander and rinse them under cool running water, stirring them gently with your fingers to remove dust and debris. Avoid rubbing them hard, which can bruise them. Drain well.
Step 6: Dry the berries. Spread the rinsed berries on clean paper towels or a clean kitchen towel and let them air-dry for 15 to 20 minutes. This removes excess moisture before storage or cooking.
How to Make Chokeberry Jam
Jam is the most popular use for chokeberry berries. The recipe is forgiving and yields a thick, spreadable product with deep color and complex flavor.
Ingredients for one batch:
- 4 cups fresh chokeberry berries
- 2 cups sugar (adjust based on berry tartness)
- 1/4 cup fresh lemon juice
- 1/4 teaspoon salt
- Optional: 1 tablespoon of honey or a pinch of ground cinnamon for depth
Step 1: Combine berries and lemon juice. Place the cleaned chokeberry berries in a heavy-bottomed pot or large saucepan. Add the lemon juice and mash the berries lightly with a potato masher or fork to break their skins. This helps release juices and allows sugar to dissolve more easily.
Step 2: Add sugar. Stir in the sugar and salt. Let the mixture sit for 15 to 30 minutes, stirring occasionally, until the sugar dissolves and the berries release their juice. You should see a purple-black syrup forming at the bottom of the pot.
Step 3: Cook over medium-high heat. Bring the mixture to a rolling boil, stirring frequently. Reduce heat to medium and continue cooking, stirring often, for 20 to 30 minutes. The mixture will thicken as water evaporates and natural pectin sets. Expected result: the jam should coat the back of a wooden spoon, and a drop on a cool plate should wrinkle slightly when you push it with a spoon.
Step 4: Test for doneness. The wrinkle test is reliable. Drop a small spoonful of hot jam onto a clean, cool plate. Let it cool for 30 seconds, then push it with your fingertip. If it wrinkles and doesn't flow back together immediately, it's done. If it's too thin, cook for another 5 minutes and test again.
Step 5: Skim foam and transfer. Remove from heat. Skim any white or purple foam that has risen to the surface. Carefully pour the hot jam into sterilized jars, leaving about 1/4 inch of space at the top. Wipe the rims clean with a damp cloth.
Step 6: Seal the jars. If you're using the boiling-water method, place sterilized lids on the jars and tighten rings fingertip-tight. Place the jars in a pot of boiling water, submerged by at least 1 inch, for 10 minutes. Remove and let cool on a clean towel. Expected result: the lids will pop inward as they cool, indicating a proper seal. Jars sealed this way will keep for up to one year in a cool, dark place.
If you prefer not to can your jam, simply store it in clean containers in the refrigerator for up to three weeks, or freeze it in freezer bags or containers for up to one year.
Other Uses: Juice and Syrup
Fresh chokeberry juice is tart and deeply flavored. Make it by simmering berries in a small amount of water (roughly 1 cup water per 2 cups berries) for 15 to 20 minutes, then straining through cheesecloth. Sweeten to taste with sugar or honey. Use juice fresh, refrigerate for up to one week, or freeze for later. Many gardeners also use chokeberry juice as the base for syrups, which are used on pancakes, yogurt, or added to sparkling water for a tart, colorful drink.
Storage and Shelf Life
Fresh chokeberry berries keep for about one week in the refrigerator in a perforated plastic bag. For longer storage, freeze them unwashed in freezer bags for up to one year. Frozen berries work well in jams and juices. Properly canned jam keeps for one year in a cool, dark cupboard. Refrigerated jam keeps for three weeks. Frozen jam keeps for one year.
Common Mistakes to Avoid
Harvesting underripe berries. Wait until the berries are fully dark purple-black. Underripe berries are even more astringent and yield less flavorful jam.
Cooking jam at too high a temperature. A rolling boil is good, but sustained high heat can scorch the bottom of your pot. Stir often and use medium-high rather than the highest setting.
Skipping the lemon juice. It brightens the flavor and helps pectin set. Don't omit it.
Overfilling jars. Leave at least 1/4 inch headspace so lids can seal properly during canning.
Trying to eat them raw in large quantities. A few frozen-thawed berries are tolerable, but most people find them unpleasantly astringent raw. They're genuinely delicious when cooked, so save them for jam and juice.
Connecting to Your Growing Practice
If you're growing chokeberry bushes mainly for their outstanding fall color and attractive winter berries, harvesting the fruit is a bonus that lets you get more value from your plant. For details on planting, spacing, and year-round care for chokeberry bushes, see our complete growing guide.
Quick Reference: Chokeberry Harvest and Jam Checklist
| Task | When / Timing | Key Detail |
|---|---|---|
| Check berry ripeness | Mid to late fall (October-November, varies by zone) | Berries should be fully dark purple-black, not reddish |
| Harvest berries | After first frost for best flavor | Hand-pick or clip small branches with berries attached |
| Rinse and dry | Immediately after harvest | Use cool water and air-dry on paper towels 15-20 minutes |
| Cook jam | Same day or within 1 week of harvest | 4 cups berries, 2 cups sugar, 1/4 cup lemon juice; cook 20-30 minutes |
| Test for doneness | When mixture thickens noticeably | Wrinkle test: drop on cool plate, push with finger; should wrinkle |
| Fill and seal jars | While jam is still hot | 1/4 inch headspace; process in boiling water 10 minutes if canning |
| Storage (refrigerator) | After cooling | Sealed jam keeps 3 weeks; frozen keeps up to 1 year |
| Storage (raw berries) | Fresh or frozen | Fresh: 1 week in fridge; Frozen: up to 1 year in freezer bags |