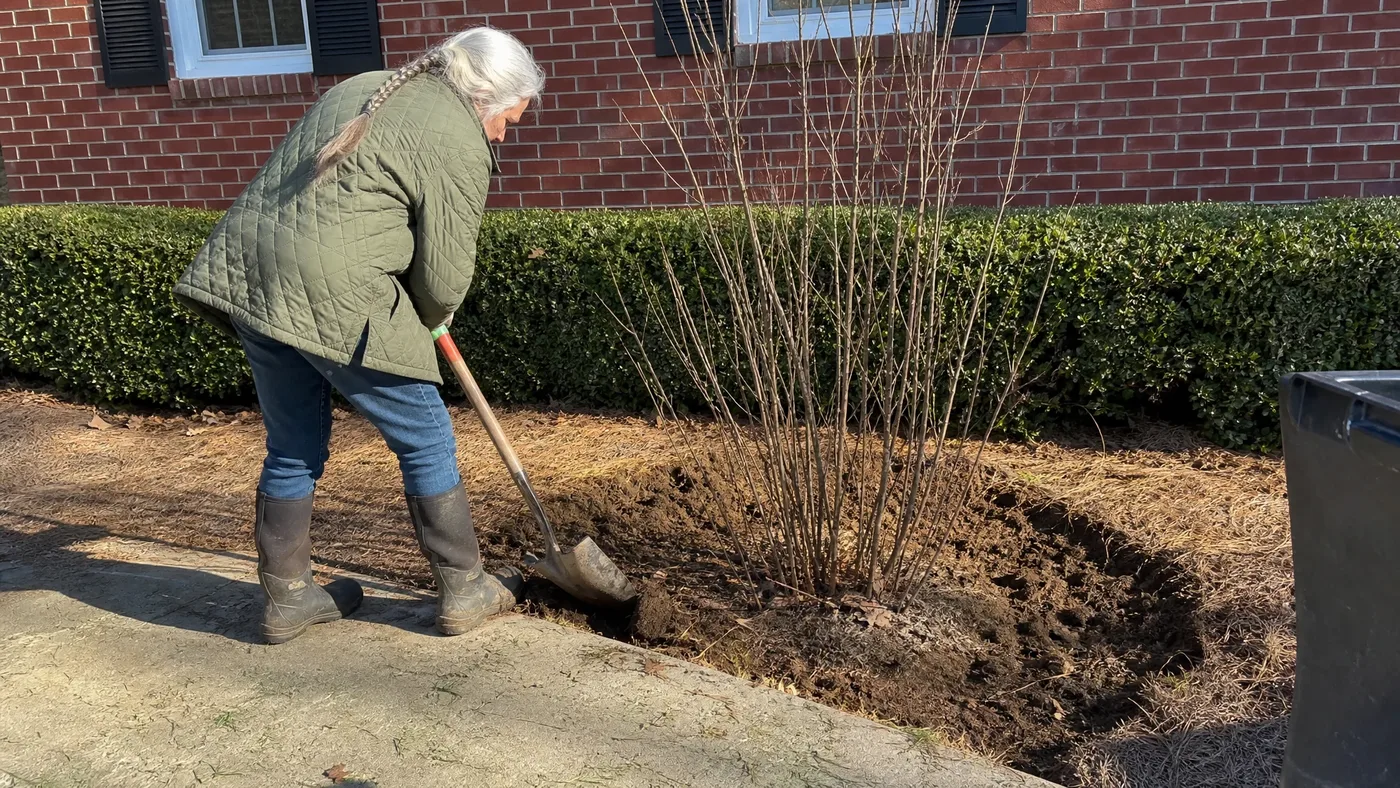
How to Transplant an Established Chokeberry Bush
A root ball is the mass of roots and soil that comes out of the ground with a plant, and it has to survive the move. Red chokeberry has a fibrous root system, and in our experience most of it sits in the upper layer of soil, so its root ball is wide and fairly flat rather than deep. That is what makes it a good candidate for moving.
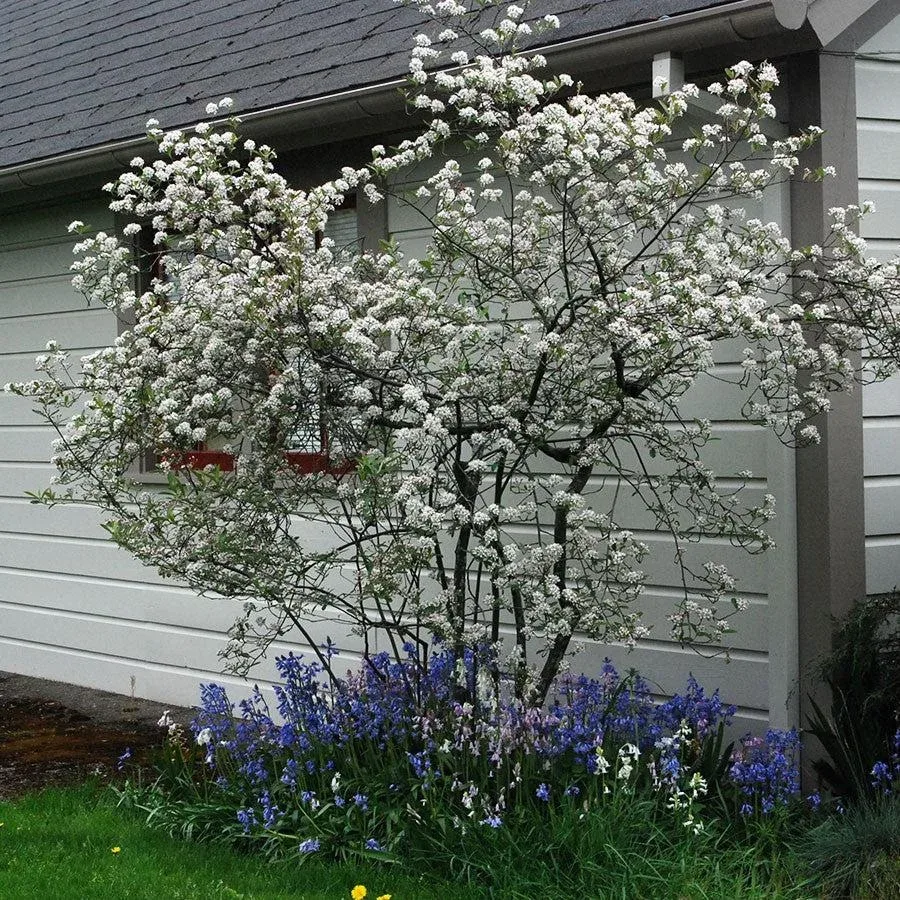
Most people expect a shrub that has sat in one spot for years to sulk when it is dug. Red chokeberry usually does not, because it has many fine roots and a ring of suckers, not one deep taproot. What goes wrong is rarely the move itself. It is digging the ball too small, tearing the suckers loose, or letting the roots dry out on the way.
This article covers moving an established red chokeberry and answers the questions customers ask us most. Read on to learn when to dig, how to lift the root zone, what to do with suckers, how to replant, and what recovery looks like.
Why a Chokeberry Bush Moves Best When Dormant
Dormancy is the rest period when a deciduous shrub has dropped its leaves, or has not yet opened its buds, and top growth has paused. That pause is what you borrow for the move.
A leafy shrub loses water through its foliage all day. Cut its roots and it cannot replace that water, so the leaves wilt and scorch. A bare shrub has almost nothing to lose. The stems ask very little of the roots while they mend, and the plant can put its energy into new root growth instead.
That is why the UConn Plant Database can describe red chokeberry as easily transplanted and established. The ease assumes a dormant move. Two windows give you that.
The Fall Window After Leaf Drop
Fall starts once the color show is over, and not before.
Red chokeberry leaves turn orange to scarlet in October. Wait until those leaves have fallen. The soil is still workable then, and the roots can keep knitting into it. The species is hardy in zones 3 to 9, and in the colder part of that range the fall window closes early, so ask your local extension service for the last safe dates.
The Early Spring Window Before Buds Open
Spring works just as well if you move early.
Dig as soon as the ground thaws and drains, before the buds swell and show green. Red chokeberry blooms in May, with white to light pink flowers and red anthers, and any bush that is already pushing buds is past the best moment. One of the most common questions we get is whether summer is acceptable. We say wait. A shrub in full leaf in the heat is the one that struggles.
Marking the Root Zone Before You Dig
The root zone is the area of soil that holds the roots feeding the plant. On chokeberry it is wider than the crown suggests, so mark it before the spade goes in.
Picture a dinner plate rather than a carrot. The roots spread outward just under the surface, and the plate is bigger than the stems standing in the middle of it. A mature plant spreads 3 to 6 feet wide, and an old plant with suckers can fill the upper end of that range or more.
Read the Crown and the Suckers
Start by looking at the plant from above and from the side.
Find the outermost stems, including any suckers that have come up away from the main clump. The roots reach at least as far as those outer stems, so they set the edge of your circle. On a shrub that may stand 6 to 12 feet tall, tie the main stems loosely together with soft twine so you can work close without snapping canes.
Draw the Circle and Prepare the New Hole
Now put the plan on the ground.
Lay a rope or trace a line of flour or marking paint around the plant, centered on the crown. Treat the canopy edge as the minimum size and go wider if you can. Tie a ribbon on the stem that faces south so you can set it the same way later. Then dig the new hole first, as described below, so the roots spend as little time in the air as possible.
Match the light the plant had before. Red chokeberry takes full sun or partial shade, but its best flowers and fruit come in full sun, so a move into deep shade will cost you both.
Digging Out the Fibrous Root Mass
Fibrous roots are the thin, branching roots that form a dense mat with no single main root. They hold soil together, which is why a chokeberry ball stays in one piece if you cut it cleanly.
The common advice is to dig a tidy, tight ball. For a wide root system that sits mostly near the surface we think that backfires, because a tight ball trims off the long roots that do most of the feeding. Dig wide and shallow, and accept that the ball will be flatter than you expect.
Cut the Trench Around the Circle
The trench defines the ball, so make it straight and clean.
Water the soil the day before so it holds together. Push a sharp spade straight down along the marked line, working all the way around. You will feel and hear roots parting. Make clean cuts with the blade rather than tearing, because a dull or twisting spade shreds the fine roots and leaves ragged ends that heal slowly. Deepen the trench until you stop meeting roots.
Undercut Without Prying on the Stems
The bottom of the ball is still attached to the ground.
Angle the spade inward from the trench and slice under the ball, working around it a little at a time. Rock the ball gently to find where it is still held. Never lever against the stems, since that cracks the crown and splits the ball. Because most roots sit near the surface, you reach the bottom sooner than you would with most shrubs. If a few roots snap, that is expected, and the next steps matter more than perfection here.
Separating Suckers From the Parent Plant
A sucker is a shoot that rises from the roots rather than from the main crown. It stays joined to the parent by an underground root until you cut it.
Expect plenty. NC State notes that red chokeberry tends to sucker and form colonies. 'Brilliantissima' is a compact selection, but it suckers too, and an established bush almost always has a ring of young stems.
Find the Connecting Root
Each sucker is tied back to the parent in a predictable way.
Once the ball is loose, follow each outlying sucker down to the root that links it to the main plant. Sever that root with a sharp spade or pruners, leaving as many fine roots on the sucker as you can. Suckers inside the circle can stay attached to the ball and ride along. A ball with a few young stems around it fills out faster than a single clump.
Decide Which Suckers to Keep
Not every sucker is worth moving.
Keep the ones with sturdy stems and their own fibrous roots, since those will establish independently. Discard thin shoots held by a single stringy root. Healthy extras make free plants, and our guide to propagating chokeberry by division or cuttings covers how to pot them.
NC State lists removing suckers and potting them while the plant is dormant as one way to propagate red chokeberry, so a dormant move is the right moment. Any that you leave behind will keep sprouting in the old spot, so dig those out if you do not want a colony there.
Lifting and Carrying a Chokeberry Bush
A wet ball of soil is heavy, and the roots inside it are fragile. The job is to move the ball as one unit without twisting it.
Slide the Ball Onto a Tarp
A tarp does the lifting for you.
Lay a tarp or a piece of burlap beside the hole. Tip the ball slightly to one side and push the tarp as far under it as you can, then tip it the other way and pull the tarp through. Never lift by the stems. We often see people grab the canes like handles, and that is how crowns split and balls fall apart. Use two people, and lift by gripping the tarp.
Keep the Trip Short and Covered
Time out of the ground is the real risk.
Drag the tarp or set it in a wheelbarrow, and make the trip as short as you can. Wrap the tarp up around the ball so wind and sun do not dry the exposed roots. Fine fibrous roots dry quickly, and a ball that sits for an afternoon loses more than a ball that is replanted within the hour. If you must wait, keep it shaded, covered and damp.
Setting the Chokeberry Bush in Its New Hole
The hole shape matters more than most people expect, because the roots must spread sideways into fresh soil.
Dig Wide, Not Deep
Match the hole to the roots, not to the stems.
Make the hole noticeably wider than the ball and no deeper than the ball is tall. Loosen the walls so they are rough rather than smooth, which lets roots push outward. Red chokeberry takes any soil texture, clay included. It does want acidic ground, with pH below 6.8 according to University of Maryland Extension, so refilling with the native soil is fine unless your test reads alkaline. Our planting guide covers site choice in more detail.
Match the Old Soil Line
The soil line is the level where the stems once met the ground.
Look for the darker band low on the stems. Set the bush so that mark sits at the surrounding soil level, and lay a straight stick across the hole to check. If you are unsure, err a touch high, because the soil settles. Turn the ribbon to face south, and cut away any twine or wrap holding the stems together.
Backfill and Firm Gently
Backfilling decides whether the roots touch soil or air.
Fill halfway, water to settle the soil around the roots, then finish filling. Firm with your hands, not your boots, because stomping compacts the fine pore spaces roots need. Leave a shallow dish around the edge of the ball so water soaks in rather than running off.
Watering in Your Moved Chokeberry Bush
A moved shrub has lost part of its root system, so it is not yet the drought-tolerant plant it will be again. Water to settle the soil first, then keep it evenly damp.
Soak Slowly the First Time
The first watering does the settling.
Pour water slowly over the whole root zone and let it sink in, then repeat once. Oregon State calls red chokeberry very adaptable as to soil, moist to well-drained, and Maryland rates it drought tolerant once established, but both describe a settled plant. Our guide to watering chokeberry goes further on that.
Mulch the Whole Circle
Mulch slows evaporation over those shallow roots.
Spread an even layer of shredded bark or leaf mold across the full root zone, and keep it pulled back from the stems so they stay dry.
A Simple Weekly Check
A short routine beats a fixed schedule.
- Push a finger into the soil beside the ball. If it is dry below the surface, water slowly.
- Look at the stems for firmness and the buds for swelling.
- Check the mulch and refresh any thin spots.
- Keep checking until the ground freezes, or through the first full summer for a spring move.
A Moved Chokeberry Bush Settles by Summer
Normal recovery looks modest. Expect fewer or smaller leaves in the first season, a thin bloom of white to light pink flowers, and few or none of the red berries. New suckers may also appear in the old spot, and you can dig those up. Worry only if the stems stay brittle and dry with no green under the bark, or if buds never open while neighboring plants leaf out. Then, check the soil moisture and wait a few weeks before deciding.
Chokeberry Bush
Nursery-grown Chokeberry Bush in sizes from 2 GALLON, shipped to your door.
From $93.12
Shop Now →Most moved bushes come through, and by the following fall the scarlet color returns. If you have kept the roots wide, cool and damp, you have done the hard part. We grow and ship our 'Brilliantissima' ourselves, in 2 gallon and 3 gallon pots with the root ball kept moist and firm, so it reaches you ready to go straight into the ground, much as you have just handled your own.