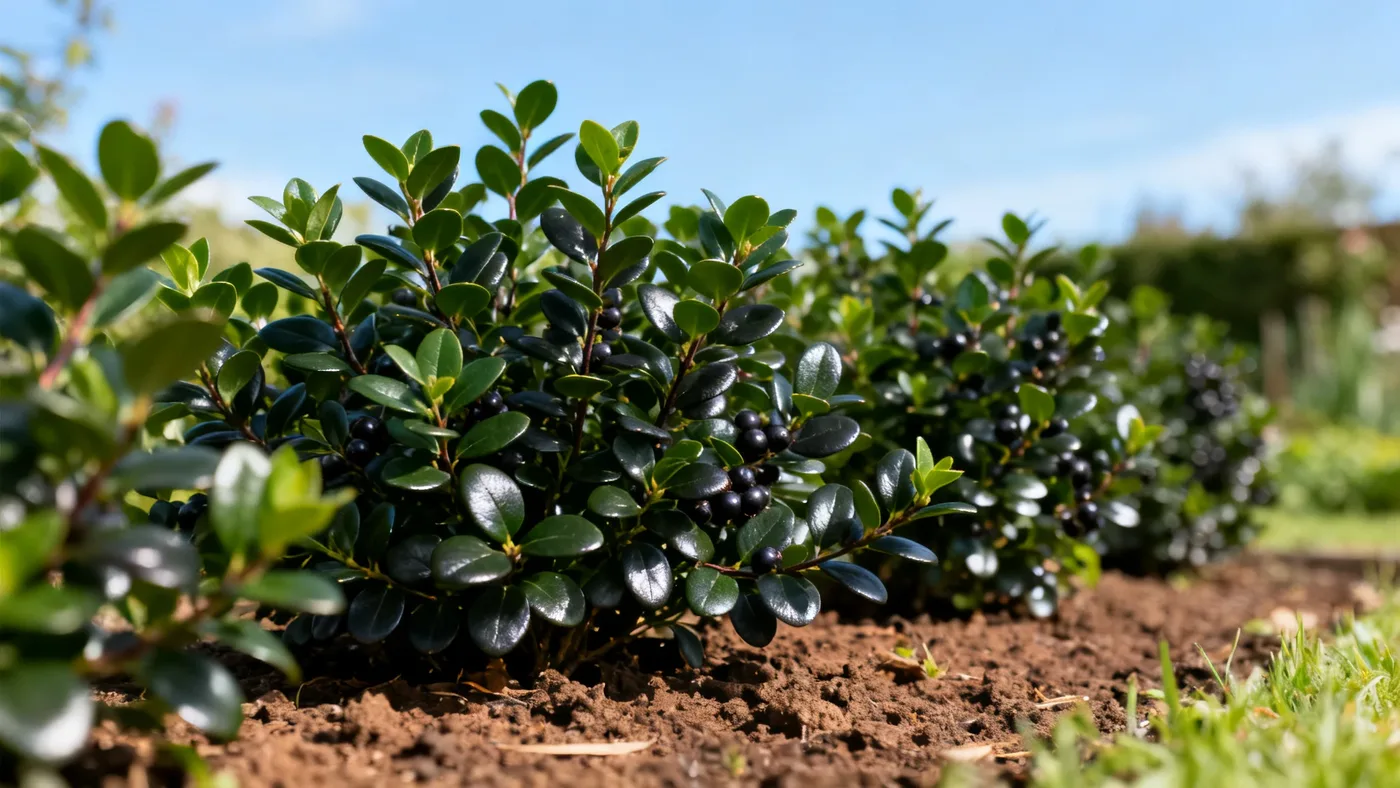
Best Soil for Chokeberry Bush: Drainage and pH Tips
Chokeberry Bush, or Aronia melanocarpa, is forgiving when it comes to soil, but the difference between an average plant and a thriving one often comes down to drainage and pH balance. Unlike finicky ornamentals, Chokeberry adapts to clay, loam, and sandy soils alike. That said, understanding what it actually prefers helps you avoid the most common mistakes: waterlogging shallow-rooted plantings, overlooking alkaline soil yellowing, and missing early signs of compaction.
This guide walks you through assessing your soil, preparing it the right way, and maintaining the conditions that let your Chokeberry reach its full potential with that outstanding fall color and reliable berry production.
What Chokeberry Bush Soil Really Needs
Native to swamps, bogs, and moist woodland edges across Eastern North America from Newfoundland to the Gulf Coast, Chokeberry evolved in wet soils. It tolerates poorly drained sites better than most garden shrubs. However, it does not require boggy conditions. Once established, it handles moderate drought quite well.
The key is this: Chokeberry wants consistent moisture during the growing season, but not standing water after a rain. It also prefers acidic to neutral soil (roughly pH 5.0 to 7.0). In strongly alkaline soil, you will see chlorosis, a yellowing of the leaves while the veins stay green. That is the most reliable sign your pH is working against you.
Materials and Tools You Will Need
- Soil test kit or extension service sample submission supplies
- Spade or garden fork
- Compost or well-aged peat moss (2 to 3 inches)
- Perlite or coarse sand (if your native soil is clay-heavy)
- Mulch (wood chips or shredded bark, 2 to 3 inches)
- Sulfur or aluminum sulfate (if raising acidity is needed)
- Lime or wood ash (only if pH is below 4.5 and testing confirms it)
- Watering can or hose with flow meter
- Ruler or measuring tape
Step-by-Step Soil Preparation and Planting
Step 1: Test Your Soil pH and Drainage
Before digging a planting hole, run a soil test. Most states offer extension service testing for under $20. You want to know three things: pH, texture (clay/silt/sand breakdown), and organic matter content. A simple pH test kit from any garden center works too, though lab tests are more reliable across the range you need (4.5 to 8.0).
For drainage, dig a hole 12 inches deep and 12 inches wide. Fill it with water and let it drain completely. Then fill it again and time how long the water takes to drain. Ideal is 1 to 2 inches per hour. If water drains in less than 30 minutes, your soil is very sandy and will not hold moisture well. If water is still standing after 4 hours, you have a compaction or clay problem that needs addressing before planting.
Step 2: Amend Acidic or Neutral Soil (pH 5.0 to 7.0)
If your test shows pH between 5.0 and 7.0, Chokeberry will thrive. Work in 2 to 3 inches of compost or aged peat moss into the planting area. Mix it into the top 8 to 10 inches of soil. This does two things: it improves water retention in sandy soils and helps loosen clay soils, improving drainage. Peat moss is slightly acidic and helps maintain the pH range Chokeberry prefers.
Do not add lime unless your pH is below 4.5, confirmed by a professional test. Over-correction is a common mistake. A pH of 6.0 to 6.5 is ideal for Chokeberry; pushing it higher can trigger micronutrient lock-up.
Step 3: Raise pH Only If Testing Confirms Alkalinity
If your test shows pH above 7.5, Chokeberry will eventually yellow. You have two options: grow it in a raised bed with fresh, acidic soil mix, or lower the existing pH with sulfur. Sulfur takes 4 to 6 months to move through the soil and take full effect, so this is not a quick fix.
Apply sulfur at the rate recommended by your test results (typically 1 to 2 pounds per 100 square feet for each full pH point you need to drop). Work it 6 inches into the soil. Water it in. Then wait at least a month before planting, and retest if possible. If you cannot wait or the alkalinity is severe, build a raised bed 12 to 18 inches deep, fill it with a 60-40 mix of compost and peat-based potting soil, and plant there. This bypasses the native alkaline soil entirely.
Step 4: Improve Drainage in Clay Soils
Clay soils hold water too long, and Chokeberry does better when the soil dries a little between waterings. If your drainage test showed water standing more than 4 hours, amend aggressively. Mix perlite or coarse sand at a 25 percent ratio into your planting hole and the surrounding 18 inches of soil. This opens up pore space and lets excess water move down and away from the roots.
For very heavy clay in poorly drained areas, consider a raised mound or berm 4 to 6 inches higher than grade. Plant into that. The extra height helps shed water away from the crown.
Step 5: Dig and Plant in Early Spring or Fall
Plant in early spring or fall, when the plant's energy is in the roots rather than new growth. Dig a hole twice as wide as the root ball and just as deep (not deeper; planting too deep is a common cause of crown rot). Set the plant so the top of the root ball is level with the ground. Backfill with your amended soil, pressing gently as you go to eliminate air pockets. Water in thoroughly.
Chokeberry comes in quart, #1, and #3 containers from nurseries. A #1 container (roughly 12 inches tall and 10 inches wide) is a good balance of size and ease of handling for most home gardeners.
Step 6: Mulch and Establish a Watering Schedule
Once planted, apply 2 to 3 inches of mulch (wood chips or shredded bark, not piled against the stem) in a circle extending to the drip line of the canopy. This keeps soil temperature stable, conserves moisture, and suppresses weeds. Refresh it annually as it breaks down.
For the first season, water once a week if you have not had rain. Aim for 1 to 2 inches per week total (rain plus hand watering). Use a soaker hose or drip irrigation to water at soil level, not overhead; overhead watering can promote fungal leaf diseases. After the first year, once the root system is established, Chokeberry is quite drought-tolerant and needs watering only during dry spells lasting more than 2 weeks.
Tips to Avoid Common Mistakes
Mistake 1: Planting in pure sand without any organic matter. Even though Chokeberry tolerates sandy soil, adding compost to sandy sites helps retain moisture and extends the time between waterings. A 2-inch layer worked in before planting makes a real difference.
Mistake 2: Ignoring alkaline soil. If your soil pH is above 7.5, Chokeberry will not look sick immediately, but yellowing will appear by year two or three. Test first. Do not guess.
Mistake 3: Overwatering established plants. After the first season, Chokeberry needs water only when the top 2 inches of soil are dry. Overwatering compacts soil and can lead to root rot. Let the soil dry slightly between waterings.
Mistake 4: Planting in a low spot where water collects. Even though Chokeberry tolerates wet sites, it means consistent moisture, not standing water. If water pools after a rain and does not drain within 8 hours, that is too wet for good health. Plant higher or in a raised bed.
Mistake 5: Amending with too much peat or sulfur without testing. Both can shift pH, and overdoing either one can create other imbalances. Always test before amending for pH.
Expected Results and Timeline
Once planted in well-prepared soil, Chokeberry grows slowly to moderately, roughly 6 to 12 inches per year. It typically reaches its mature size (3 to 6 feet tall and wide for the species form, 1 to 2 feet for dwarf cultivars) in about 3 to 5 years with good soil, moderate watering, and annual pruning to shape.
You can expect flowers in mid to late spring (April to May, depending on your zone; Chokeberry is hardy in zones 3 to 9). Once the plant is established, berry production improves year to year. The berries persist into winter, providing food for birds and extending the ornamental value of your planting.
Best fall color, which is one of Chokeberry's standout features, appears most reliably in full sun and acidic to neutral soil. If your soil is correct but fall color is muted, check light: the plant needs at least 6 hours of direct sun daily to color best.
For detailed care instructions after planting, including pruning and seasonal maintenance, see the complete growing guide.
Soil Quick Reference
| Condition | Ideal Range | Action if Outside Range |
|---|---|---|
| Soil pH | 5.0 to 7.0 (acidic to neutral) | pH above 7.5: add sulfur or use raised bed. pH below 4.5: uncommon, but add lime if test confirms. |
| Soil texture | Clay, loam, or sandy | Sandy: add 2-3 inches compost. Clay: add perlite/sand at 25% ratio to planting hole. |
| Drainage rate | 1 to 2 inches per hour | Too fast (dry quickly): add compost. Too slow (standing water): amend with perlite or raise bed. |
| Organic matter | 3 to 5 percent | Low: work in 2 to 3 inches aged compost or peat moss into top 8 to 10 inches. |
| Mulch depth | 2 to 3 inches around base (not touching stem) | Refresh annually. Mulch keeps soil temperature stable and moisture consistent. |
| Watering, first season | 1 to 2 inches per week total | Track rain and hand-water to reach target. Use soaker hose, not overhead. |
| Watering, established (year 2+) | Water only when top 2 inches dry | Let soil dry slightly between waterings. Drought-tolerant once rooted. |